Skip to content
From recorded activity to finished video

Add speed, pace and heart rate to your videos

Your camera supplies the picture. Your activity recording supplies the numbers. Create the gauges in GaugeReel, then put the exported layer over your footage in a video editor.

Download freeFree, ongoing

Windows + macOS · No watermark · No time limit · No GaugeReel account required

Try it first

Start with a sample speed and heart-rate layout

Download the synthetic activity and Free profile to explore the workflow before using your own recording.

In GaugeReel, import the GPX, then use My profiles → Import profile to open the downloaded profile. Click “Free speed and heart rate — synthetic sample” in My profiles to apply it, then choose the sample as each gauge’s Source. This invented 12-second activity has no matching footage; use it to explore gauges and exports. Follow the steps below with your own files to align a real clip.

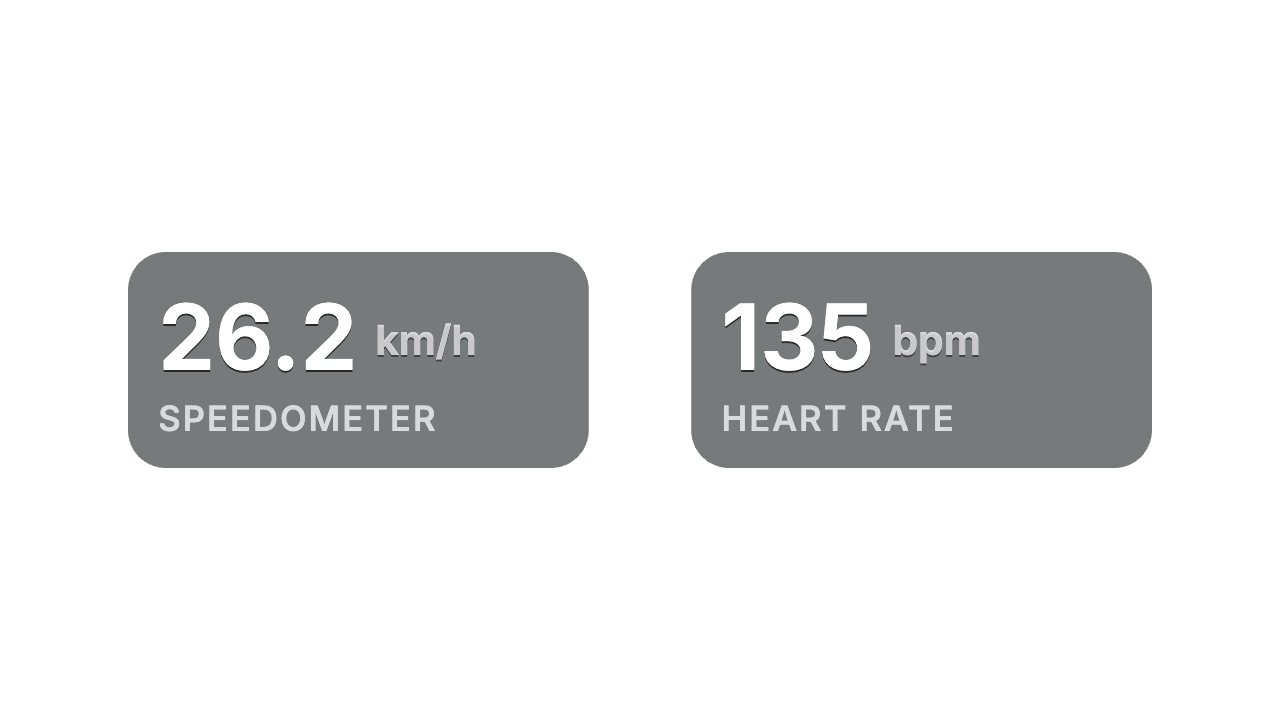
Free speed and heart-rate gauges rendered by GaugeReel using synthetic sample data
Actual GaugeReel renderer · Free speed + heart rate · synthetic sample data. One transparent frame; the sample does not include footage or a finished video.
01 / Prepare

Get your two files

Start with one short, continuous clip and the activity recorded at the same time.

The video

Copy your GoPro, DJI or phone footage to your computer. For Insta360, reframe and export the view you want first. Keep this first clip at normal speed. These are footage sources; a phone video alone is not a GPS activity recording.

The recorded activity

Export the original activity as FIT where possible, or a timestamped GPX. Use the completed ride, run or walk, not a planned route or summary CSV. A route plan does not describe when you moved or your recorded effort.

Garmin

In Garmin Connect on the web, open Activities → All Activities → your activity → settings gear. Choose Export Original / Export File for the device’s original file, usually FIT; unzip it if needed. Garmin’s export instructions.

Wahoo ACE, BOLT 3 and ROAM 3

Enable both USB access and FIT file access in the Wahoo app’s device settings. Connect the powered-on computer with a USB data cable, then copy the completed activity’s FIT from the exports folder. Mac users need an MTP client. Wahoo’s model-specific instructions.

iGPSPORT iGS620

The iGS620 manual describes powering off, connecting by USB and entering connection mode, then copying the FIT activity from iGPSPORT/Activities. Other models may use a different export path. iGPSPORT’s iGS620 manual (PDF).

These are file-export paths, not native GaugeReel account connections or certification of every device. A compatible file still needs the actual fields below.

02 / Choose your result

Use the stats your recording contains

Cycling: speed and heart rate

Pair your ride footage with its bike-computer or watch activity. Speed needs recorded speed or usable timestamped GPS positions; heart rate needs recorded HR samples. Power and cadence need those recorded sensor fields too. Start with the available Free speed and heart-rate gauges.

Running: pace, distance and effort

Use a recorded run with usable speed data and select min/km or min/mi for pace. Add distance and heart rate only when available. Check a steady running section and a stop; GPS noise and pauses can make momentary pace jump.

Walking and hiking: show where you are

A moving location display needs timestamped latitude and longitude. Elevation needs usable elevation data. Maps require Basic, $10/month; speed, distance and other available Free gauges can be used without a map. A planned trail alone cannot reproduce your progress through the footage.

03 / Design and align

Match the numbers to the action

  1. Load your video for reference. In the data panel, choose Add GPX / FIT / GoPro MP4 and open your activity file. Inspect its available-field labels before choosing gauges.
  2. Add the gauges you need and set their units. If you imported more than one recording, select each gauge and check its Source. For example, the heart-rate gauge must use the source that contains HR.
  3. Find a visible event that also appears in the data, such as starting to move after a stop. Adjust that source’s Sync offset until the gauge changes at the same moment. For an activity event at 120 seconds that happens 5 seconds into your clip, start with an offset of −115 seconds.
  4. Check another event near the end. If the first lines up but the second drifts, adjust the data Speed percentage (stretch), then recheck both points. Keep Real time / 100% when no drift correction is needed. This is manual alignment, not guaranteed automatic sync.
  5. Position the gauges away from faces and important action. Play the whole short section, checking units, missing values and timing before exporting.
04 / Export the layer

Export a Free chroma-key MP4

This file contains the gauges on a solid background. Your video editor will remove that background.

Choose chroma-key MP4, a green background and a short export range matching your clip. Use 1920 × 1080 at 30 fps for this walkthrough. Avoid green gauge colors so the editor does not remove them with the background. Export and play the file to check that the numbers animate correctly.

Free limits

Transparent PNG sequences or chroma-key MP4; maximum width 1920, maximum height 1080, up to 30 fps. PNG needs an editor that imports image sequences. Free does not include every gauge, style or activity profile.

When a paid plan helps

Basic ($10/month) adds maps, more styling, transparent ProRes 4444 MOV or WebM, and up to 60 fps. Premium ($20/month) adds 4K and full-height 1080 × 1920 portrait layers, keyframe animation and Send to Resolve. Free and Basic share the 1920-wide / 1080-high cap. Compare current plans.

05 / Finish the video

Put the layer over your footage in Clipchamp

Clipchamp’s personal editor offers a free green-screen effect and 1080p export. Use your own footage and overlay for this recipe.

  1. Create a project and import your footage plus the GaugeReel chroma-key MP4.
  2. Place the footage on the timeline, then put the overlay on a track above it. Align the start of the overlay with the same clip section you used in GaugeReel.
  3. Select the overlay clip. Open Effects and apply Green screen. Select the matching screen color and adjust the threshold until the background disappears without eating into the gauges.
  4. Preview the beginning and end. Check alignment and gauge edges against both bright and dark parts of the footage, then export the finished video at 1080p.

Follow Microsoft’s green-screen instructions; see Clipchamp’s Free feature details. An editor account may be required. The finished video comes from Clipchamp; GaugeReel exports the overlay.

Before you get stuck

Common questions

Can I keep exporting for free?
Yes. Free is an ongoing plan, with no watermark or time limit and no GaugeReel account required. It includes transparent PNG sequences and chroma-key MP4 overlays up to 1920 pixels wide, 1080 pixels high and 30 fps. Some gauges, styles and profiles require a paid plan.
Will this work without GPS in my camera?
Yes, if you have a matching recorded activity with the fields you need. Your camera supplies the picture; the FIT or GPX supplies the numbers. A camera without GPS cannot supply a route by itself. Without coordinates in any source, leave out GPS-dependent gauges and maps.
Why is heart rate missing?
Heart rate must have been recorded and included in the imported file. Check the source’s available fields and the gauge’s Source selection. Try the original FIT if a GPX export dropped sensor data. GaugeReel cannot recover heart rate that was never recorded.
What if I stopped filming or have several clips?
Align each clip to its own point in the activity and check the timing again after every gap. Start with one continuous clip. One offset does not account for camera stops, removed pauses or multiple edits; align those sections separately.
Can I put swimming stats on video?
Only supported time-series fields actually present in your recording can drive gauges. Native pool lengths, stroke counts, intervals and swim pace per 100 m or yd are not supported by this workflow. Open-water maps require usable recorded GPS; GaugeReel cannot reconstruct an underwater route or repair missing GPS.
Does GaugeReel produce the finished video?
GaugeReel exports a separate overlay layer. Add that layer above your footage in a video editor, remove the solid background for chroma-key MP4, and export the finished video from the editor. Transparent PNG sequences need an editor with image-sequence support.
Start with one clip and one recording.

Finish a short Free speed or pace overlay first. Add more gauges once the source and timing are right.